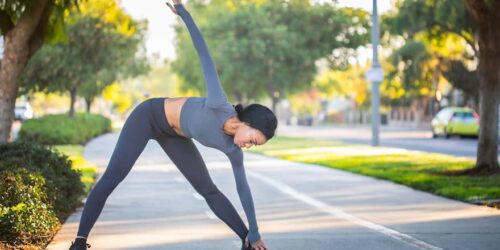
11 Easy Arm Balances Yoga For Beginners
Additionally, arm balances can aid in boosting one’s sense of bravery, inner strength, and self-assurance. Additionally, they are a fun and playful way for us to approach our practice and our bodies! Why not give this awesome free 30-day Yoga Challenge a try if you’re new to arm balancing (and balancing in general) and would love to work on your strength? When you start practicing yoga every day, you’ll quickly feel stronger and gain more self-assurance!
Table of Contents
How to Prepare for Yoga Arm Balances?
Stage 1. Physical
• Take it slowly. Think about the steps necessary to get there rather than seeing it as the complete expression of the pose. You might be surprised at how simple it is to achieve the final shape when you approach the pose one step at a time.
• Protect your wrists. The wrists are strained in all arm balance poses. To protect your wrists, make sure to warm up your wrists before practice and stretch them out after. To feel more stable while holding the poses, spread your fingers widely and press your fingertips firmly into the mat.
• Engage your core. Even though arm balances are supported by the hands, the core is responsible for most of the work. Make sure your core muscles are actively contracted. Before your practice, warm-up exercises can help you engage your back and abs.
• Activate your legs. When holding the pose, make sure to engage your legs and use them to help you when you need to find your leverage and relieve some of the weight from your arms.
• Flex your feet. Your legs will become more active and feel lighter if you flex your feet. In many positions, active feet will also safeguard the knee joints.
• Fix your gaze. To find balance, locate a stationary dot in front of your body. Take care not to strain your neck by looking up or back.
• Breathe regularly, don’t forget! While holding your breath during an arm balance may be a natural reaction, with practice and the right gaze, you can extend your holds.
Stage 2. Mental
• Believe in your capabilities. Consider approaching yoga arm balance postures with a cheerful attitude. You can perform the pose with a steady focus and breathing if you have faith in yourself and a positive outlook.
• Keep practicing. Last but not least, be sure to keep trying even after failing. Yoga arm balances are difficult to master the first time. With time and patience, results will appear.
Arm Balance Yoga Poses to Begin With
Crow Pose (Bakasana)
Due to its stability and proximity to the ground, the crow pose is a popular beginner arm balance for yoga practitioners. Despite the fact that it appears to require a lot of shoulder strength, it really just requires balance! By moving your weight forward, the trick is to determine where your center of gravity is.
How to move into Crow Pose:
begin in the middle lift. Spread your fingers wide and plant your hands firmly on the ground. The backs of your thighs should be supported by your elbows, which are bent. Start shifting your weight forward until your toes feel light, which is further forward than you might think. Gaze forward about two feet. Embrace your glutes with your heels hugged up.
Tips for Crow Pose:
• Turn your hands just a little bit outward so that your pointer finger faces forward. Your elbows will remain tightly coiled as a result.
• Maintain a high hip position. You will feel lighter the higher your hips are.
• Make sure to place your knees on the backs of your triceps rather than your outer arms. Long, fitted pants can be useful for traction.
• Toe lifting will be simpler the higher your knees are placed on your triceps. Prior to beginning, loosen up your hips and concentrate on your armpits!
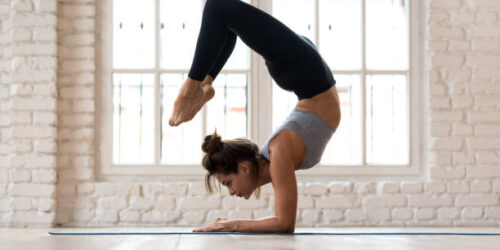
Headstand (Sirsasana)
The second-most popular yoga inversion for beginners, after side crow, is the supported headstand. It’s a common peak pose because you get completely upside down, despite the fact that it’s more of a head balance than an arm balance. Mastering a headstand is a great place to start if you’re working on achieving a forearm stand or a handstand.
How to move into Supported Headstand:
Get down on your knees and start praying. With your fingers interlaced and your elbows at shoulder-width apart, lower your forearms to the floor. The crown of your head should be on the ground as you tuck your chin into your chest. Lift your knees, tuck your toes, and then slowly begin to walk your toes inward toward your head. Into your chest, first, draw one knee, then the other. Press your feet upward as soon as you regain balance.
Tips for Supported Headstand:
• Magnetize your elbows toward one another while pressing your forearms firmly into the ground. The pressure on your neck is relieved while your shoulders and back are engaged.
• Put as much forward movement as you can with your toes. Lifting your toes off the ground will be simpler the higher your hips are.
• When you press your legs up, squeeze your inner thighs together.
Forearm Stand (Pincha Mayurasana)
A great way to develop back and shoulder strength for your yoga practice is to practice forearm stand. Instead of bringing your hands together as some people do, keep them parallel to the ground to help your serratus anterior, a key muscle for all advanced arm balances, contract.
How to move into Forearm Stand:
Get to your forearms by descending from the tabletop. Maintain shoulder-width distance between your hands and elbows while keeping your forearms parallel to one another. Walk your toes in toward your chest while lifting your knees. Intensify the pressure you apply to your hands. Gently hop up while raising one leg high and bending your bottom knee slightly. Squeeze your legs together once you have reached a stable position.
Tips to move into Forearm Stand:
• Put a lot of pressure on your hands. Your shoulders and chest will become more active as a result.
• Elbows have the propensity to splay out, so hug them together to keep them stacked.
• direct your attention downward. If you gaze too far forward, you’ll invite a curve into your lower back
Firefly Pose (Titibasana)
One of the hardest yoga poses to master is Firefly (Titibasana), which calls for a lot of strength and flexibility. Start slowly and go with what feels right in your body. There are many ways to modify this pose to make it more accessible.
How to move into firefly pose:
Start in a forward fold with your feet slightly wider than hip-width. Walk with your hands a little bit behind your feet as you begin to budge your knees. Put the bottoms of your palms down. Kneel as needed and encircle your shoulders with your legs. Once you are essentially sitting on your own shoulders and triceps, lower your sit bone until it is parallel to the ground. Start bending your knees gradually.
Tips to move into Firefly Pose:
• Squeeze the backs of your thighs into your arms and your arms into your thighs
• Start off by keeping your elbows slightly bent. You can start to straighten your arms more over time
• Lean a little forward with your shoulders. You can feel lightness in your feet thanks to the slight forward lean.
• A little, a lot, or not at all, bend your knees!
Hurdler’s Pose (Eka Pada Koundinyasa II)
The balance of flexibility and strength required for the hurdler’s poses will probably appeal to those with open hips. Yoga practitioners love it because it’s entertaining to incorporate into vinyasa flows!
How to move into the hurdler’s pose:
Begin in a downward-facing dog position. Three-legged dog pose: lift one leg up high. After that, hug the same-side knee to the outside of the elbow. In order to place your inner thigh on your tricep, look forward while beginning to bend your elbows back. To get off the ground, extend your back leg.
Tips to move into hurdler’s pose:
• To gain strength and balance, squeeze your elbow and thigh together.
• Bring your inner thigh as high up as you can onto your tricep.
• Find your center of gravity by looking ahead. Squeeze your elbows in closer and press harder into your palms if your chest leans significantly toward the ground.
• To find more stability and support in your upper body, you can place the hip bone of your back leg on your tricep.
Side Crow (Parsva Bakasana)
There are several ways to perform the side crow exercise, but the one that is easiest to perform involves placing your outer thigh on both triceps. Because of the additional support, you might even find side crow to be easier than crow pose if you have flexibility in your twists.
How to move into side crow:
Begin on the ground in a tuck squat. Turn your body to one side while placing your palms firmly on the ground. Your outer thigh should be pressed into your triceps as your elbows are bent. Lean forward and begin to look ahead. Lift your toes off the ground once you have found your center of balance.
Tips to move into side crow:
• Put a tight squeeze on your thighs.
• As much as possible, keep your elbows on your thigh hip-width apart.
• Avert putting your entire weight on your hip. Your front and back elbows should both be equally weighted.
Scissor Leg Side Crow (Eka Pada Koundinyasana I)
It might be time to try the scissor-leg version if you are already at ease with the side crow. For your strength and balance, try the harder yoga pose known as Eka Pada Koundinyasana I.
How to move into scissor leg side crow:
Start in a tuck squat on the ground, just like in a side crow. Put your palms on the ground while twisting your body to one side. To press your outer thigh into your triceps, bend your elbows. Lean forward and look a few feet into the future. Lift your toes off the ground once you have found your center of balance. Straighten your bottom leg out to the side as you begin to extend your top leg toward the back of your mat.
Tips for scissor leg side crow:
• Your center of gravity will shift as your top leg is extended back. To remain stable, move slowly and contract your leg muscles.
• For continued leg activity, flex your toes.
• Stay lifted in your chest by pushing the earth away with your palms.
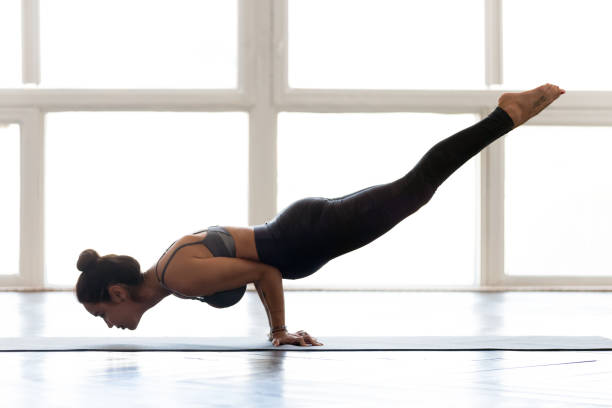
Peacock Pose (Mayurasana)
Due to the angle of your hands and wrists, Peacock Pose has a different center of gravity than the majority of other arm balances in yoga. It requires flexibility and strength in the wrists, so you should warm them up before you start.
How to move into peacock pose:
Flip your palms from the tabletop position so that the fingers point back toward your knees. Bend your elbows as you forward-lean your shoulders. As you approach the mat, let your head naturally descend. Lifting your knees off the ground with your toes will allow you to put more weight on your upper body. One foot at a time, begin to lift your toes off the ground by squeezing your inner thighs.
Tips to move into peacock pose:
• To balance your torso on your elbows, keep your elbows close together and narrow.
• To prevent overstretching your wrists, keep your upper body nearly upright.
• Find an effective leg position by experimenting with a variety of them.
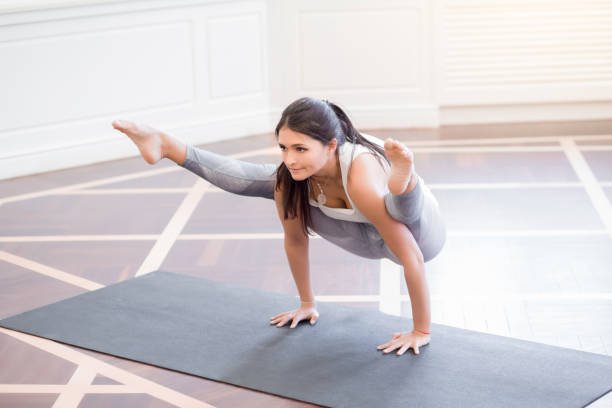
Eight Angle Pose (Astavakrasana)
Finding a sense of lightness in your lower body is the main goal of the Eight Angle Pose. Eight Angle, like Hurdler’s Pose, is made simpler with open hips, so warm up your hip flexibility before attempting it.
How to move into Eight Angle Pose:
Start off in a relaxed, comfortable seat. Start to hike your left leg like a backpack over your shoulder. To keep your leg in place, press it into the back of your arm and shoulder. Put your hands on the floor in front of you after that. Plant your left hand where it should be and space your right hand at shoulder width to keep your thigh on your shoulder. Lift your right foot to cross over your left foot which is flexed as you slightly shift your weight into your right hip. As you look and lean forward, bend your elbows. To raise your hips, press the top leg onto your arm. Kick your feet out to the side, squeezing your left arm firmly between your thighs.
Tips for Eight Angle Pose:
• Once your hands are on the ground, it’s okay if your leg slides off your shoulder. • Be certain that it adheres to the back of your arm.
• Your ability to lift your toes off the ground is caused by squeezing your thighs tightly around your arm. Select the right squeeze, then maintain it!
Chin Stand (Ganda Bherundasana)
If you enjoy vinyasa yoga, a chin stand is a fun transition that you can use to make chaturanga dandasana more difficult. It requires courage, flexibility in the spine, and strong shoulders!
How to move into chin stand:
Lift one leg high behind you while in downward dog. As you begin to bend your elbows back, look forward and shift into a high plank position. Your chin should be gently lowered towards the ground as you squeeze your elbows into your sides. To raise your bottom leg, gently hop while micro-bending your bottom knee. Grab both of your legs at once.
Tips for chin stand:
• Walking with your toes pointing downward in a dog position might be beneficial. Your hop will be a little bit shorter due to the greater lift in your hips.
• To engage your chest and triceps, apply strong pressure to your palms. Your chin should have very little to no weight.
• In the backbend, maintain an active core to safeguard your spine.
Handstand (Adho Mukha Vrksasana)
One of the trickiest and most sought-after yoga poses is the handstand. It frequently requires years of consistency and dedication to master this pose. You’ll be one step closer to finding balance in your hands with the advice provided below!
How to move into handstand:
Begin in a downward-facing dog position. Lift your heels and begin to wiggle your toes as much as you can inward, towards your hands. Step with your bottom leg by extending one leg upward, microlending it, and taking tiny hops. Squeeze your legs together as soon as you reach a state of balance where your hips stack over your shoulders.
Tips to move into handstand:
• Maintain a straight arm posture. You’ll feel as though you’re going to fall over when you bend your elbows.
• Give attention to your core strength. By engaging your core, you help to stabilize your pelvis and protect your lower back, maintaining the straightness of your spine.
• With your palms, push the earth away.
Summary: Be Careful
You can improve your body and mental strength and attitude by practicing arm balances. They can make yoga more playful and enjoyable while also revealing our true nature.
It’s important to keep in mind that most arm balances put a lot of strain on the wrists. If you have wrist problems or injuries, practice with caution and consult your yoga instructor about modifications and poses that are appropriate for you.