What Are The Benefits of Wheel Posture? How To Do It?
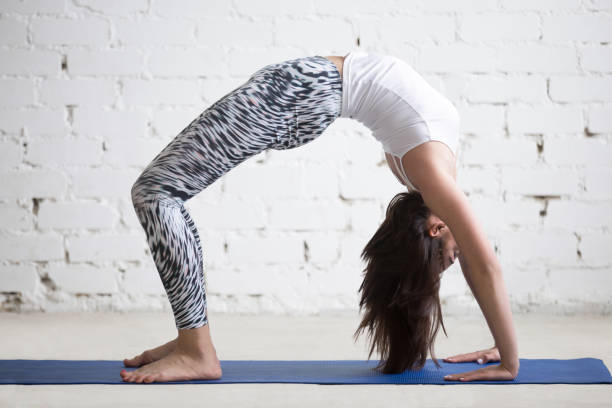
A more difficult backbend pose is the wheel pose. The Wheel is a more popular name for this pose, which is also known as Urdhva Dhanurasana in Sanskrit and Upward Facing Bow in another.
Finding the ideal name for your practice wheel can be as difficult as finding one. To pop up into Wheel, you need time and practice.
Table of Contents
5 Benefits of Wheel Pose
It Stretches and Opens Up the Accessory Muscles Used in Breathing.
A muscle known as an intercostal muscle lies in between each rib. When we inhale, the intercostal muscles work together to expand the rib cage, and when we exhale, they contract back together. These intercostals receive an amazing stretch while doing Wheel as you backbend up and out of your ribs and chest.
It Strengthens the Muscles of the Shoulder Girdle.
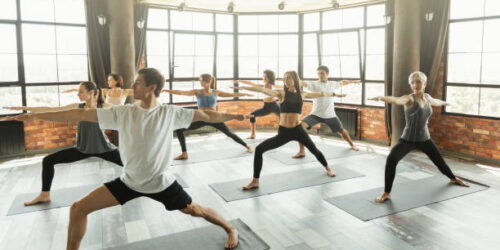
When you are in a warrior position, do you ever find it difficult to raise your arms? Ever feel like your posture is too relaxed? The muscles supporting your shoulders could be rigid or weak.
The rhomboids are large muscles that run from the neck to the middle of the back, the trapezius, are big muscles that run from the neck to the mid-back, and the supraspinatus and infraspinatus, are deep muscles that run from the shoulder blade to the upper arm, are a few key muscles in Wheel.
Wheel Pose is fantastic for enhancing your muscle strength, which will also improve your daily posture.
It Stretches the Hip Flexors.
Do you spend your entire working day seated at a desk or computer, with the hips folded forward and in flexion? Those hip flexors are begging to be stretched! Press the front hip bones up toward the sky once you are in Wheel. The stretch will benefit your adductors and psoas muscles.
It’s a Great Inversion.
The cardiovascular, lymphatic, nervous, and endocrine systems are said to benefit from inversions. The heart is above the head in Wheel, as it is in many other inversions.
According to some scientists, when we invert, we give the heart a break because the brain’s baroreceptors detect an influx of blood and will, as a result, slow the flow. The blood pressure and heart rate are reduced by a slowed flow.
It’s a Heart-opener, Which Helps Us Maintain Emotional Stability.
You may experience greater empathy for other people, patience during trying times, and equanimity if you practice heart-opening poses. Overall, completing Wheel Pose will make you feel accomplished and upbeat.
Continue your practice and keep in mind that getting there may take some time because yoga practice is a journey.
Step-by-Step Instructions
- Start out by lying on your back. Kneel down and place your parallel, hip-distance feet directly under yours.
- With your palms facing down and your fingers pointing in the direction of your shoulders, reach back and place your hands alongside your ears.
- Taking a deep breath in, lift your hips, torso, and head enough to place the crown of your head on the mat without allowing your feet or knees to spread apart. Make sure your head is not supported by any of your weight.
- Draw your elbows together, tuck your upper arms into your shoulders, and begin to arch your upper and middle back.
- Set your hands and feet down and lift into the pose with the subsequent inhalation.
- Reach your tailbone toward the backs of your knees while turning your inner thighs toward the floor. Check to see if your feet are not turned out, then push down with your big toes.
- Keep your forearms parallel to the floor and your shins perpendicular to one another as you move your feet toward your hands to deepen.
- When you want to exit the position, tuck your chin and bring your body all the way to the floor. (Don’t place your head on the ground.
Beginner Tips
Explore the Pose
Your lower back will be compressed if your knees and feet spread out as you lift into this pose. One method to avoid that is to wrap a strap around your thighs just above the knees and fasten it there. This will keep your thighs parallel and at hip width. By positioning a block between your feet and pressing the block’s ends with the bases of your big toes, you can prevent your feet from turning out. Put your feet firmly into the block as you ascend.
If you are having trouble getting into this position, try lying backward through a folding chair with your feet flat on the ground. Push your back up from the chair with your hands on the floor or on blocks that are stabilized against a wall. Maintain the upward pressure until your arms are straight.
Be Mindful!
Before attempting this pose, spend some time strengthening your wrists. To prevent injury, divide your weight evenly between your hands.
If you have a heart condition, high or low blood pressure, vertigo or severe vertigo, heartburn, an ear infection, or certain eye conditions (glaucoma, detached retina, diabetic retinopathy, recent cataract surgery, etc.), modify or avoid this pose.—ask your ophthalmologist if you are unsure). Under these circumstances, you might not want to lower your head below your heart.
Consider performing modifications or Setu Bandha Sarvangasana (Bridge Pose) if you are prone to shoulder dislocation.
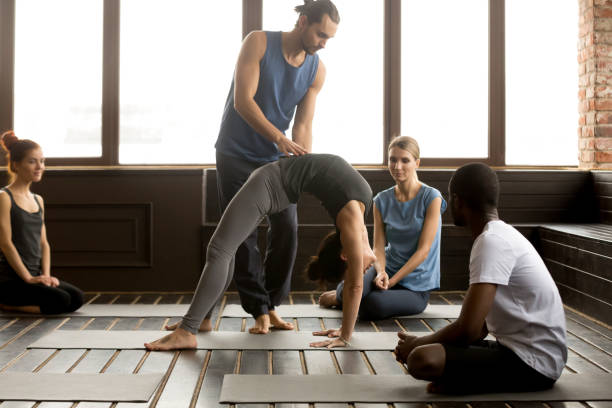
Teacher Tips
This cue will help protect your students from injury and help them have the best experience of the pose:
Full movement into this pose may be hampered by tight armpits or groins. To assist you in achieving the full backbend, you can rest either your hands or your feet on a pair of blocks. To prevent your hands or feet from slipping, brace the blocks against a wall and, if you’d like, cover them with a sticky mat.
Common Mistakes
Hyperextending Lower Back
Overly tight gluteus maximus contraction can tilt your pelvis up, compressing your spine and hyperextending your lower back. Do not overdo it; only firm your glutes.
Splaying Knees and Feet
Your lower back will be compressed if you spread your knees and feet apart. Try squeezing a block between your thighs to help you keep the legs parallel if you have trouble with the legs separating and the feet turning out.
Variations
Wheel Pose Against a Wall
Depending on your flexibility, stand a few feet away from the wall. Pressing down through your heels, space your feet out to hip-width or further. As you enter Urdhva Hastasana (Upward Salute), reach your arms up and alongside your ears. Then, as you bend your knees, let your upper back curve, and reach your arms back toward the wall, continue to lift your chest upward. Back up your head a little. You have the option of staying put or slowly moving your hands down the wall. Walk your hands back up the wall to exit the pose after remaining there for a few breaths at a location where you can breathe easily.
Wheel Pose on a Chair
On the seat of a chair, spread a folded blanket. Sit on the blanket with your back to the chair’s back and your feet hip-distance apart. Lower yourself back slowly until your shoulder blades are at the edge of the chair and your hands are at your sides with your fingers pointing down toward your heels.
Wheel Pose on Your Toes
Put your weight on your toes to emphasize the backbend.
Conclusion: Listen To Your Body
Everybody will experience the wheel pose differently, so experiment with different movements slowly and safely to find what works. If the pose still feels stiff, for example, try tilting the pelvis backward and then relaxing the glutes. As always, pay attention to your body and respect where you are in your practice.